Up and Running in 5 Minutes!
Follow the 3 short videos and you'll be ready to go in just a few minutes. More tips below.
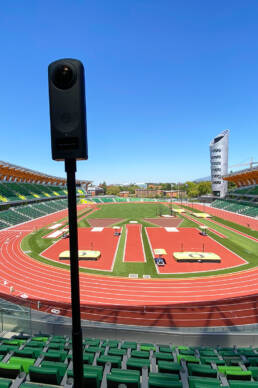
1: Tripod Assembly
The tripod legs should have at least one section extended (use all 3 if it’s windy). Lift the silver brackets at the top of each leg to widen the angle of them.
Attach the pole to the tripod. Rotate each section of the pole counter-clockwise to extend, then rotate the clockwise to tighten. If it becomes wobbly, re-tighten.
2: Camera Setup
You will have to follow these instructions EVERY TIME the camera is turned on. Print out the cheat sheet below if needed:
3: Hiding from Camera
Ideally, it is best to hide from the camera while it’s shooting the 360. The 10-second timer should give you enough time to run behind a corner.
In case you can’t, we can digitally remove you by shooting 2 identical images: in the first image, get as back from the camera as you can. Re-shoot that image but move to a different location away from where you stood during the first shot.
Tips for the Best Images
- Once you’ve powered on and configured the camera, you only need to press the shutter button once for every 360-degree image. It does not matter what direction the LCD screen is facing (there is no “front”).
- Turn on all lights in the room and any rooms you can see.
- Make sure everything is clean and looks game-ready – no towels draped over exercise equipment, etc.
- Sometimes the monopod will wobble if you’re not careful. Always ensure that it’s standing firmly in place, especially when capturing images. Make sure it’s fully extended (5 total sections including the base).
- When in doubt, shoot extra images. We can always cut them out but we can’t add them later if you don’t have the 360 camera.
- Since the battery life is atrocious, I have included a USB power bank to charge things between shoots.
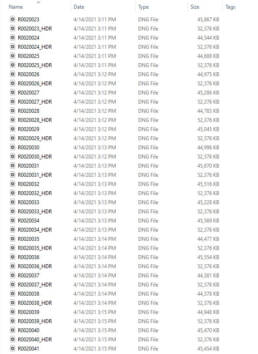
UPLOADING PHOTOS
If on a PC, simply connect the included USB cord to the camera and then the PC. The file window should open automatically. If not, go to MY COMPUTER and select the camera.
If using a Mac, you will likely need to download this program to help locate the camera and copy the files: https://support.theta360.com/uk/download/filetransfer/.
When you can view the files on the camera, copy everything from the “DUALFISHEYE” folder to your computer (unfortunately, you won’t be able to preview them at this time). Upload EVERY file to the link we sent you.
The file structure will look like the image to the right. Each photo is actually 2 different files and we will need them BOTH. The thumbnails/previews will likely look pink and super dark. That is normal. We will merge the shots and upload them to a site for you to review.