Uploading Instructions
You need to transfer all images from the camera to your computer before you can upload.
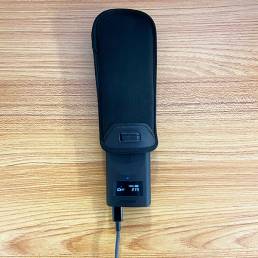
Be sure to protect the lenses when powering on the camera and plugging in the USB-C cord.
Uploading from PC
Step 1
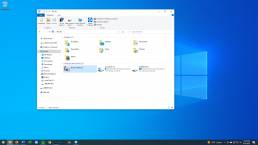
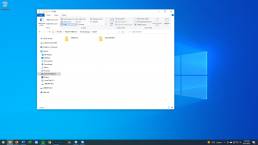
Turn the camera on and plug into the computer using a USB-C cord. A new folder window may open automatically. If not, open This PC or My Computer to view storage devices.
Step 2
Under the “Devices” section, open “Ricoh Theta Z1” and then click “Fixed Storage“.
Step 3
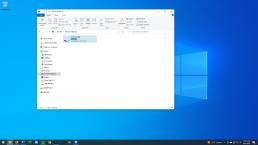
Next, open the folder labeled “DCIM“.
Step 4
If you captured photos using the mobile app, open the “100RICOH” folder.
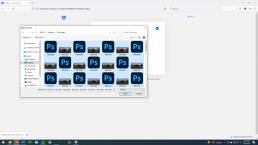
Step 5
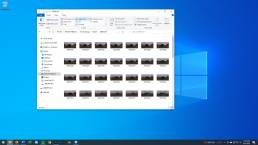
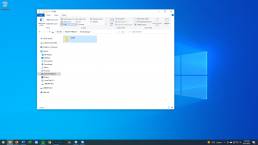
Inside the “100RICOH” folder, you will see a list or group of thumbnails. There should be 2 identical files for each photo: a JPG and DNG image. We will use them all.
Step 6
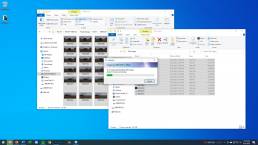
Create a new folder on the desktop. I called mine “360 images“. Select all the images in the “100RICOH” folder and drag them to the new folder.
Step 7
Open the Dropbox URL that you were provided. Click the blue “Add Files” button and then click “Files from your computer“.
Step 8
Navigate to the folder you created. Select all the images and then click “Choose for Upload“.
Step 9
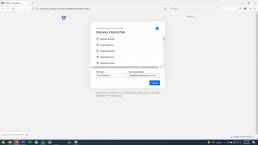
Fill out the boxes labeled “Your name” and “Your email address” and then click “Upload“.
Step 10
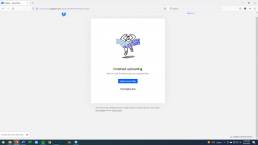
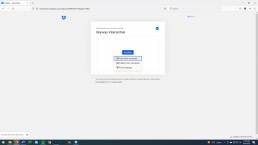
The images will now begin uploading. Once complete, you will see the screen above telling you “Finished Uploading“.
Uploading from Mac
Step 1
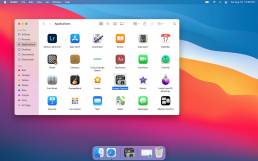
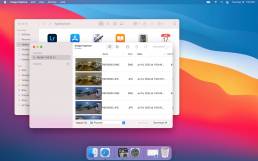
Turn the camera on and plug into the computer using a USB-C cord. Open the IMAGE CAPTURE app.
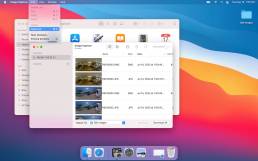
Step 2
Click “Ricoh Theta Z1” under the “Devices” section in the left column. Then, select the “Import To” drop-down menu.
Step 3
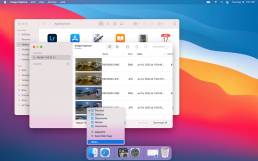
Inside the “Import To” drop-down menu, select “Other” at the bottom of the list.
Step 4
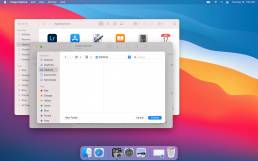
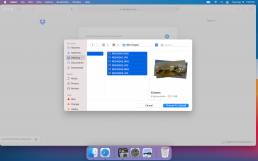
Next, choose a location on your computer to import the photos. In this example, we will create a new folder on the Desktop.
Step 5
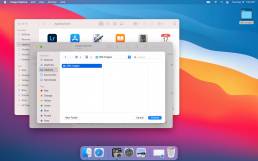
I created a New Folder called “360 Images“. Select this folder and then click “Choose“.
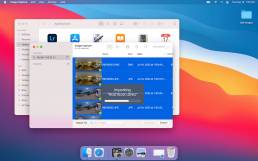
Step 6
In the menu at the top of the screen, click the “Edit” drop-down and then click “Select All“. Next, click “Download All“.
Step 7
The images will begin downloading from the camera onto your computer.
Step 8
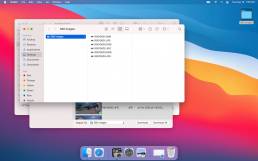
When complete, open the folder you created. There should be 2 versions of each file ending in .DNG and .JPG.
Step 9
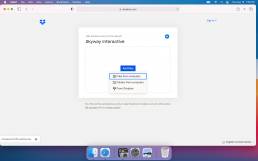
Open the Dropbox URL that you were provided. Click the blue “Add Files” button and then click “Files from your computer“.
Step 10
Navigate to the folder you created. Select all the images and then click “Choose for Upload“.
Step 11
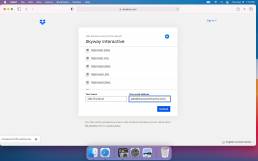
Fill out the boxes labeled “Your name” and “Your email address” and then click “Upload“.
Step 12
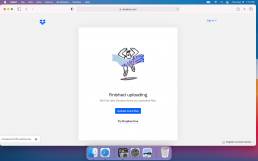
The images will now begin uploading. Once complete, you will see the screen above telling you “Finished Uploading“.